Notes on Provisioning VVF 9.1 (vCenter > VCF Ops > License Server) on ESXi via the CLI
· 8 min read
These are my notes from building a VVF lab environment. Because of how my environment is set up, I did everything through the CLI as much as possible. I'll go all the way to the point where the License Server can hand out a license.
Prerequisites
- ESXi 8.x (the free edition) is already installed
- A DHCP server is running
- You have a VVF license
- You have downloaded the following software from the Broadcom portal
- ESXi 9.1 Depot (example file: VMware-ESXi-9.1.0.0200.25557999-depot.zip)
- vCenter 9.1 (example file: VMware-VCSA-all-9.1.0.0300.25629530.iso)
- VCF Ops 9.1 (example file: Operations-Appliance-9.1.0.0400.25541561.ova)
- VCF License Server 9.1 (example file: Vcf-License-Server-9.1.0.0400.25541557.ova)
Upgrading ESXi
Upload the ESXi 9.1 Depot file to ESXi, then run the following.
export ESXI_DEPOT=<DEPOT FILE PATH>
List the available profiles.
esxcli software sources profile list -d ${ESXI_DEPOT}
Apply the upgrade.
esxcli software profile update -p <the profile you found above> -d ${ESXI_DEPOT}
If you get warnings about unsupported hardware and the like, add --no-hardware-warning and run it again — at your own risk.
Reboot once the upgrade has been applied.
Installing vCenter
Transfer the vCenter ISO file to a Linux machine that can reach ESXi.
export VCENTER_ISO=<VCENTER ISO PATH>
Then mount it.
mount ${VCENTER_ISO} /mnt
Pull out embedded_vCSA_on_ESXi.json.
cp /mnt/vcsa-cli-installer/templates/install/embedded_vCSA_on_ESXi.json ~/
Edit embedded_vCSA_on_ESXi.json.
(How to edit it is up to you — read through the file and decide.)
vi ~/embedded_vCSA_on_ESXi.json
Install vCenter.
/mnt/vcsa-cli-installer/lin64/vcsa-deploy install ~/embedded_vCSA_on_ESXi.json --accept-eula --acknowledge-ceip --no-ssl-certificate-verification
After vCenter is installed, connect ESXi to it and finish the setup.
Installing VCF Ops
To register the vCenter / ESXi licenses, install VCF Ops. Transfer the VCF Ops OVA image to a Linux machine that can reach vCenter.
export VCFOPS_OVA=<VCF OPS PATH>
Set up the environment variables you need.
export NET_NAME=<Port Group>
export DS_NAME=<Datastore name>
export ROOT_PASSWORD=<Root Password>
export VCENTER=<vCenter IP>
export DC_NAME=<vCenter DataCenter Name>
export VC_NAME=<vCenter Cluster Name>
Check the OVA parameters.
./ovftool --acceptAllEulas ${VCFOPS_OVA}
Deploy the OVA. (The command below assumes DHCP. If you want a static IP address, fill in the required values from the parameters you just listed.)
./ovftool --acceptAllEulas -n=vcfops \
  --network=${NET_NAME} \
  -ds=${DS_NAME} \
  --powerOn \
  -dm=thin \
  --prop:root_password=${ROOT_PASSWORD} \
  --deploymentOption=xsmall \
  ${VCFOPS_OVA} \
  vi://${VCENTER}/${DC_NAME}/host/${VC_NAME}
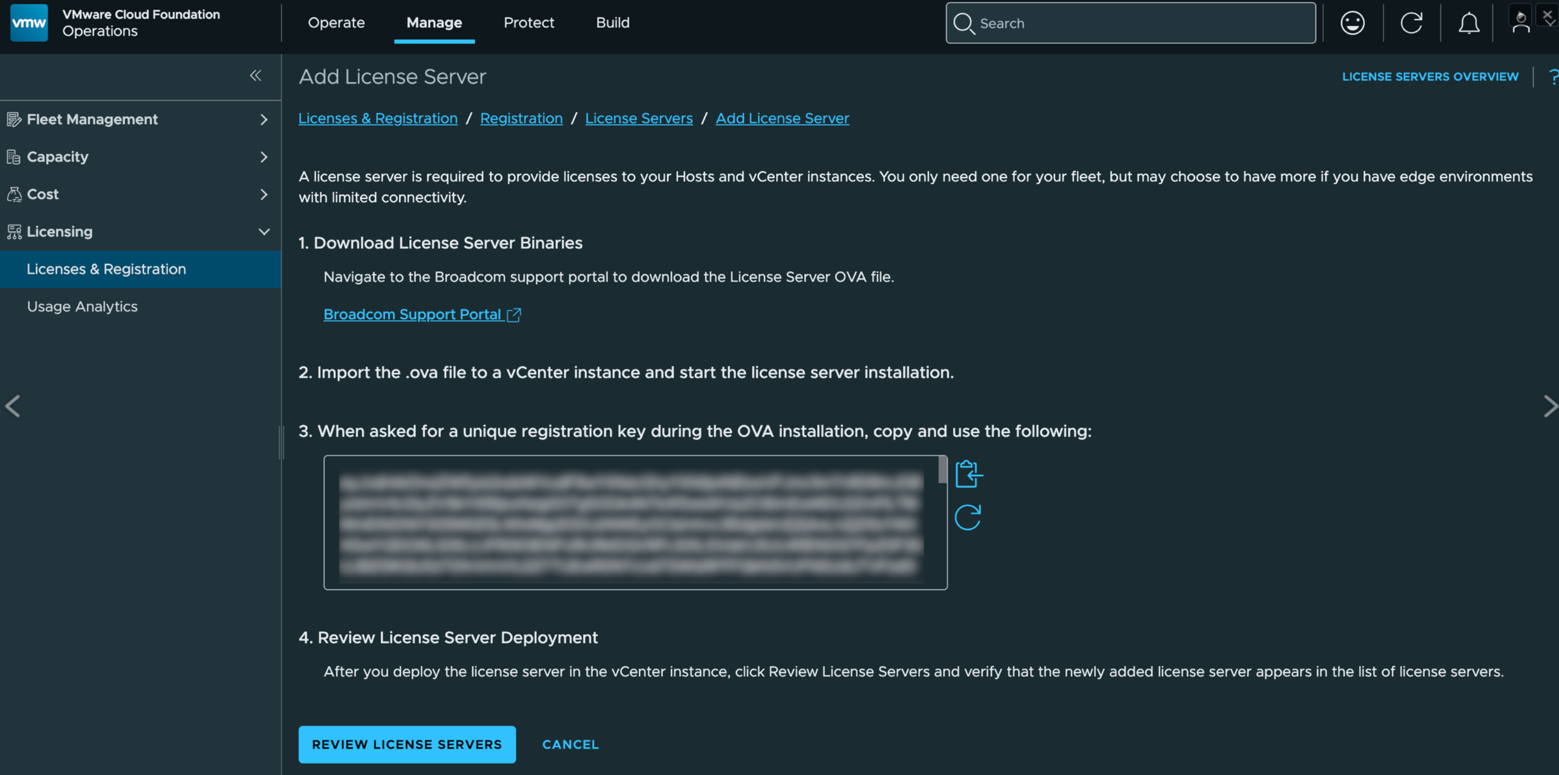
Once VCF Ops is installed and vCenter is registered, follow the path below and copy the value in the blurred-out area.
Manage > Licensing > Licenses & Registration > Manage > License Servers
Installing the VCF License Server
Install the License Server, which became mandatory as of VVF 9.1. Transfer the VCF License Server OVA image to a Linux machine that can reach vCenter.
export VCFLIC_OVA=<VCF LIC PATH>
Paste in the VCF Ops REGISTRATION CODE you copied in the previous step.
export VCF_OPERATIONS_LICENSE_SERVER_REGISTRATION_CODE=<VCF REG CODE>
Set up the environment variables you need.
export NET_NAME=<Port Group>
export DS_NAME=<Datastore name>
export VCENTER=<vCenter IP>
export DC_NAME=<vCenter DataCenter Name>
export VC_NAME=<vCenter Cluster Name>
Check the OVA parameters.
./ovftool --acceptAllEulas --noSSLVerify --skipManifestCheck \
  --X:injectOvfEnv --allowExtraConfig --X:waitForIp --sourceType=OVA \
  ${VCFLIC_OVA}
Deploy the OVA. (The command below assumes DHCP. If you want a static IP address, fill in the required values from the parameters you just listed.)
./ovftool --acceptAllEulas --noSSLVerify --skipManifestCheck \
  --X:injectOvfEnv --allowExtraConfig --X:waitForIp --sourceType=OVA \
  --powerOn \
  "--net:Network 1=${NET_NAME}" \
  --datastore=${DS_NAME} \
  --diskMode=thin \
  --name=vcflc \
  --prop:otk=${VCF_OPERATIONS_LICENSE_SERVER_REGISTRATION_CODE} \
  ${VCFLIC_OVA} \
  vi://${VCENTER}/${DC_NAME}/host/${VC_NAME}
That completes the installation of everything VVF needs. After that, register your licenses from VCF Ops.
Conclusion
I was able to build a VVF 9.1 environment entirely through the CLI.