Wavefrontで学ぶ分散トレーシング Part-2
· 15 分で読めます
この文章は、Wavefrontで学ぶ分散トレーシング シリーズの第二回目です。
シリーズ
第一回 : 概要編
第二回 : Spring Bootで分散トレーシング ← いまここ
第三回 : REDメトリクスって何?
第四回 : サービスをつなげてみる
第五回 : Pythonで分散トレーシング
第六回 : AMQPで分散トレーシング
第七回 ; サービスメッシュで分散トレーシング
始めに
この回では、まずは手取り早くWavefrontの分散トレーシングを知っていただくためSpring Bootを使ったアプリケーションを紹介します。 なお、プログラミング経験ですが、皆無で大丈夫です。筆者自身インフラエンジニア出身なので、複雑なコードはかけません。
準備編
Spring BootはJavaのフレームワークです。そのため、最低限以下が必要です。
- Java JDK 8+
Oracle JDKに従いJDKをインストールしてください。 今回はこれだけでOKです。 なお、本来は、エディターも必要ですが、今回のレベルであれば、なしでできるのであえて割愛します。 また、今回の内容はすべて無料でできますのでご安心ください。
ソースコード
ここに公開しています。
https://github.com/mhoshi-vm/wf-demanabu-dis-tracing/tree/master/2
アプリの準備
準備ができたら、以下のURLにアクセスしてください。
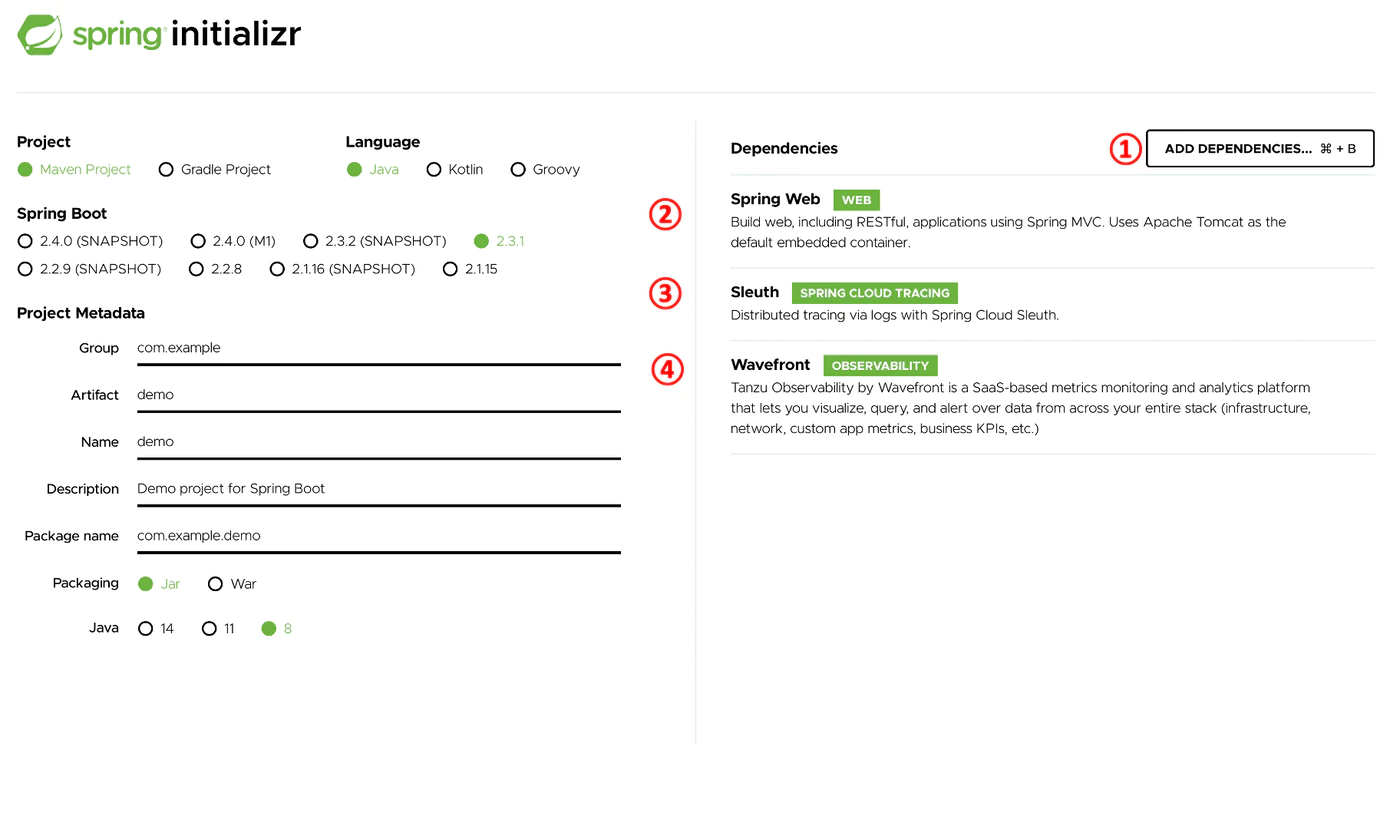
ログイン後、以下を実施します。
- Add Dependencies を選択
- Spring Webを検索して追加
- Sleuth も同様に追加
- Wavefront も同様に追加
最後にGenerateをクリックします。 すると、zipファイルのダウンロードされるので、どこでもいいので展開してくだい。 展開後、以下のようなファイル構造になっているかと思います。
mhoshino@mhoshino demo % tree
.
├── HELP.md
├── mvnw
├── mvnw.cmd
├── pom.xml
└── src
    ├── main
    │   ├── java
    │   │   └── com
    │   │       └── example
    │   │           └── demo
    │   │               └── DemoApplication.java
    │   └── resources
    │       ├── application.properties
    │       ├── static
    │       └── templates
    └── test
        └── java
            └── com
                └── example
                    └── demo
                        └── DemoApplicationTests.java

14 directories, 7 files
Javaのコードを少しだけ編集します。 お気に入りのエディターで以下のファイルを開いてください。
mhoshino@mhoshino demo % vi src/main/java/com/example/demo/DemoApplication.java
これを以下の内容に差し替えてください。
package com.example.demo;

import java.util.Map;

import org.slf4j.Logger;
import org.slf4j.LoggerFactory;
import org.springframework.boot.SpringApplication;
import org.springframework.boot.autoconfigure.SpringBootApplication;
import org.springframework.http.ResponseEntity;
import org.springframework.web.bind.annotation.GetMapping;
import org.springframework.web.bind.annotation.RequestHeader;
import org.springframework.web.bind.annotation.RestController;

@SpringBootApplication
public class DemoApplication {

	public static void main(String[] args) {
		SpringApplication.run(DemoApplication.class, args);
	}

}

@RestController
class HelloRestController {

	private static final Logger LOGGER = LoggerFactory.getLogger(HelloRestController.class);

	@GetMapping("/hello")
	public ResponseEntity<String> hello (@RequestHeader Map<String, String> header){
		printAllHeaders(header);return
		ResponseEntity.ok("Hello World!");
	}

	private void printAllHeaders(Map<String, String> headers) {
		headers.forEach((key, value) -> {
			LOGGER.info(String.format("Header '%s' = %s", key, value));
		});
	}
}
さらに以下のファイルを開きます。
mhoshino@mhoshino demo % vi src/main/resources/application.properties
そして以下の内容を追記します。
management.endpoints.web.exposure.include=wavefront
server.port=8081
wavefront.application.name=demo
wavefront.application.service=HelloRest
コード編集は以上です。上のコードが何をするかは後ほど説明します。
分散トレーシングを早速試してみる
それではアプリケーションを稼働させます。 以下のコマンドを実行してください。
mhoshino@mhoshino demo % ./mvnw spring-boot:run
初回は起動までに時間がかかるかもしれませんが、二回目以降は早くなります。 そして以下のように出力されたら成功です。
  .   ____          _            __ _ _
 /\\ / ___'_ __ _ _(_)_ __  __ _ \ \ \ \
( ( )\___ | '_ | '_| | '_ \/ _` | \ \ \ \
 \\/  ___)| |_)| | | | | || (_| |  ) ) ) )
  '  |____| .__|_| |_|_| |_\__, | / / / /
 =========|_|==============|___/=/_/_/_/
 :: Spring Boot ::        (v2.3.1.RELEASE)

2020-07-15 10:24:49.985  INFO [hellorest,,,] 66556 --- [           main] com.example.demo.DemoApplication         : No active profile set, falling back to default profiles: default
2020-07-15 10:24:50.487  INFO [hellorest,,,] 66556 --- [           main] o.s.cloud.context.scope.GenericScope     : BeanFactory id=930eeca1-6f00-3004-b800-9fca9761a189
2020-07-15 10:24:50.831  INFO [hellorest,,,] 66556 --- [           main] o.s.b.w.embedded.tomcat.TomcatWebServer  : Tomcat initialized with port(s): 8081 (http)
2020-07-15 10:24:50.837  INFO [hellorest,,,] 66556 --- [           main] o.apache.catalina.core.StandardService   : Starting service [Tomcat]
2020-07-15 10:24:50.837  INFO [hellorest,,,] 66556 --- [           main] org.apache.catalina.core.StandardEngine  : Starting Servlet engine: [Apache Tomcat/9.0.36]
2020-07-15 10:24:50.914  INFO [hellorest,,,] 66556 --- [           main] o.a.c.c.C.[Tomcat].[localhost].[/]       : Initializing Spring embedded WebApplicationContext
2020-07-15 10:24:50.914  INFO [hellorest,,,] 66556 --- [           main] w.s.c.ServletWebServerApplicationContext : Root WebApplicationContext: initialization completed in 917 ms
2020-07-15 10:24:50.990  INFO [hellorest,,,] 66556 --- [           main] i.m.c.instrument.push.PushMeterRegistry  : publishing metrics for WavefrontMeterRegistry every 1m
2020-07-15 10:24:51.583  INFO [hellorest,,,] 66556 --- [           main] o.s.s.concurrent.ThreadPoolTaskExecutor  : Initializing ExecutorService 'applicationTaskExecutor'
2020-07-15 10:24:51.853  INFO [hellorest,,,] 66556 --- [           main] o.s.b.a.e.web.EndpointLinksResolver      : Exposing 3 endpoint(s) beneath base path '/actuator'
2020-07-15 10:24:51.889  INFO [hellorest,,,] 66556 --- [           main] o.s.b.w.embedded.tomcat.TomcatWebServer  : Tomcat started on port(s): 8081 (http) with context path ''
2020-07-15 10:24:51.908  INFO [hellorest,,,] 66556 --- [           main] com.example.demo.DemoApplication         : Started DemoApplication in 3.558 seconds (JVM running for 3.794)

A Wavefront account has been provisioned successfully and the API token has been saved to disk.

To share this account, make sure the following is added to your configuration:

	management.metrics.export.wavefront.api-token=2b7543f5-2fc7-42ea-afdf-2c329a87d76e
	management.metrics.export.wavefront.uri=https://wavefront.surf

Connect to your Wavefront dashboard using this one-time use link:
https://wavefront.surf/us/pGqpk9QCjb
別のプロンプトで以下のコマンドを数回、実行してください。
mhoshino@mhoshino demo % curl localhost:8081/hello
うまくいっていればHello World!と出力されるはずです。
そして、しばらくしたら以下のURLを参照してください。
http://localhost:8081/actuator/wavefront
するとあら不思議、WavefrontのUIへ移動されます。
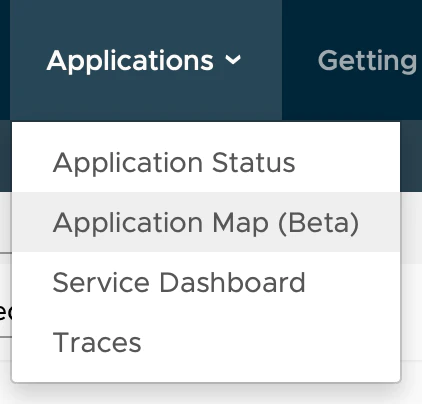
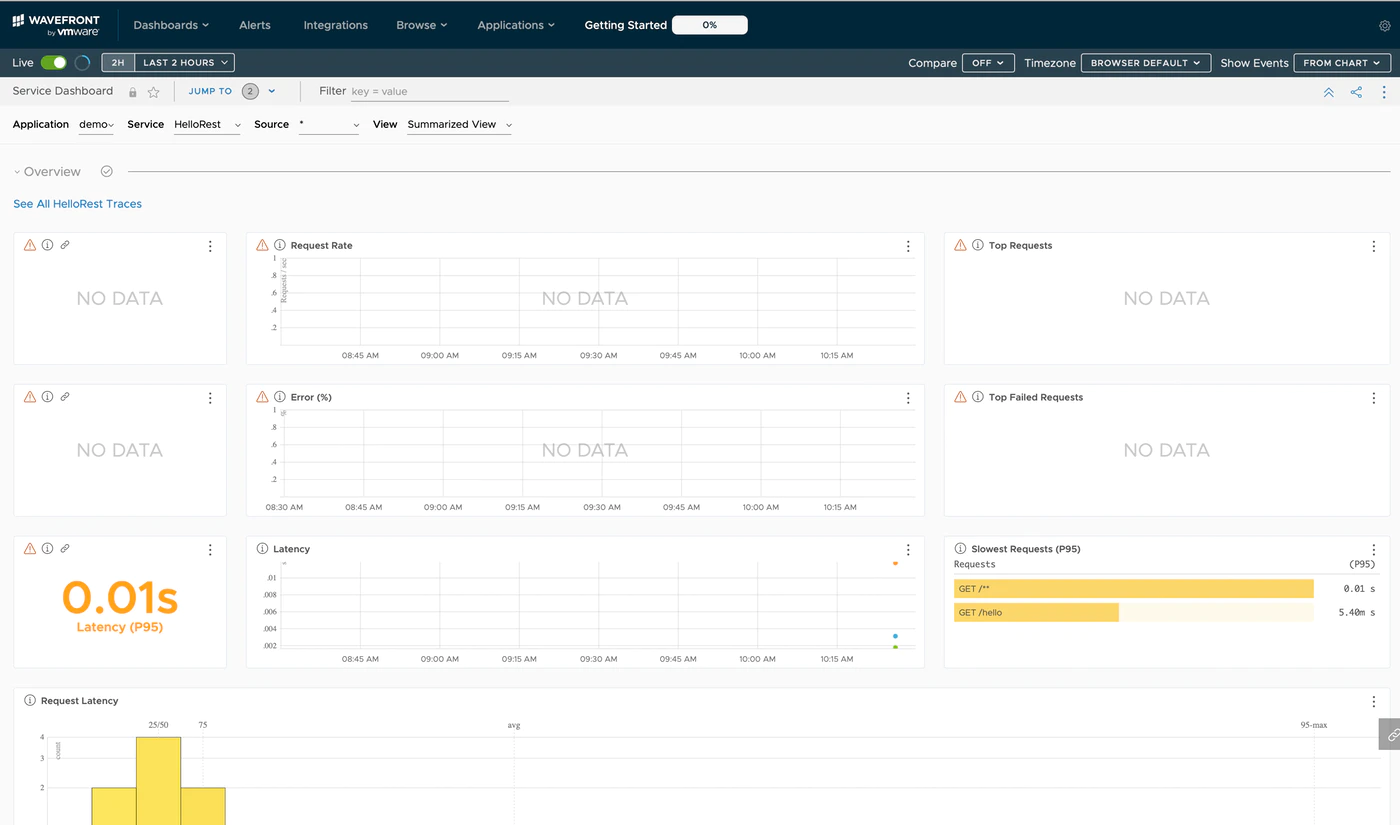 上のApplication > Application Map(Beta)を選択します。
 何も表示されないかと思いますが
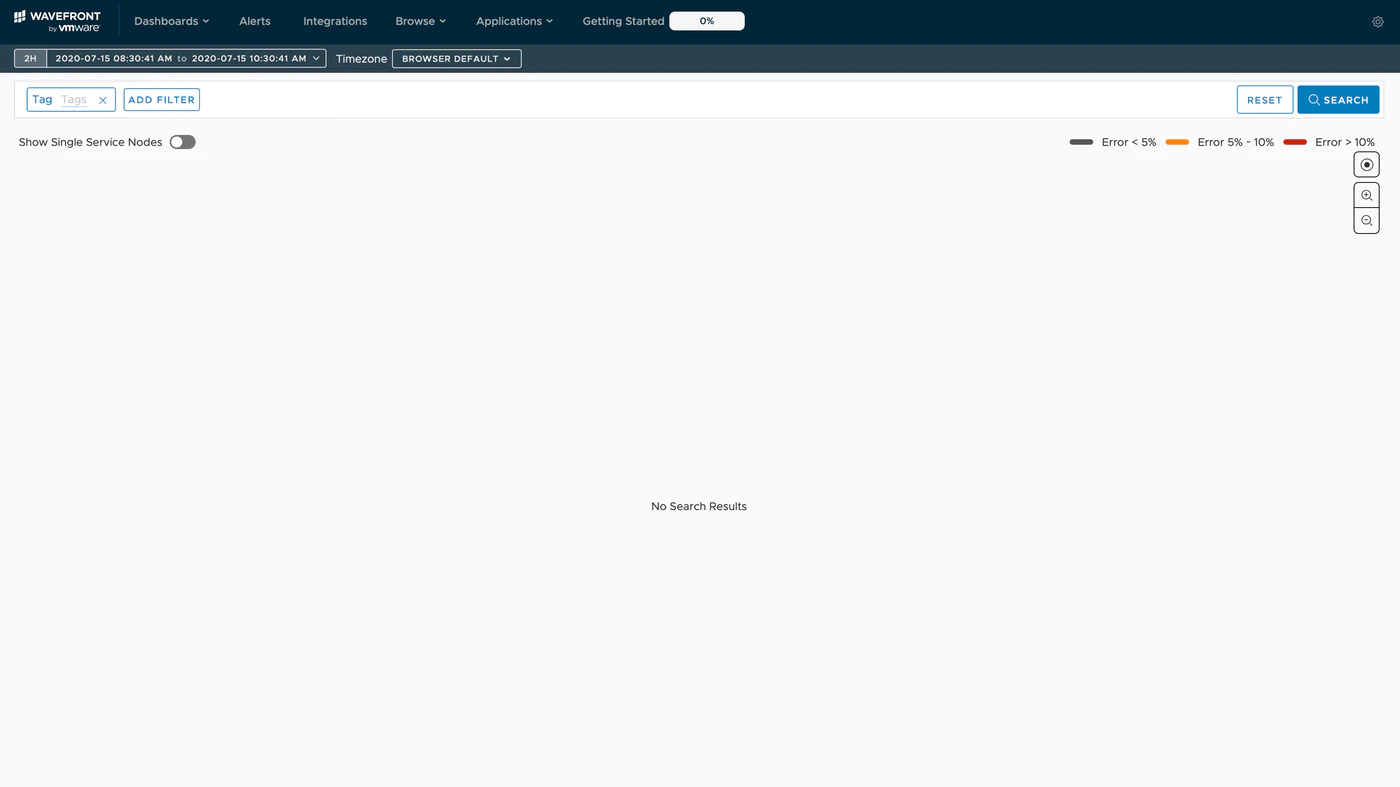 左上のShow Single Service Nodesを選択してください。
 すると、今回のアプリケーションが表示されます。
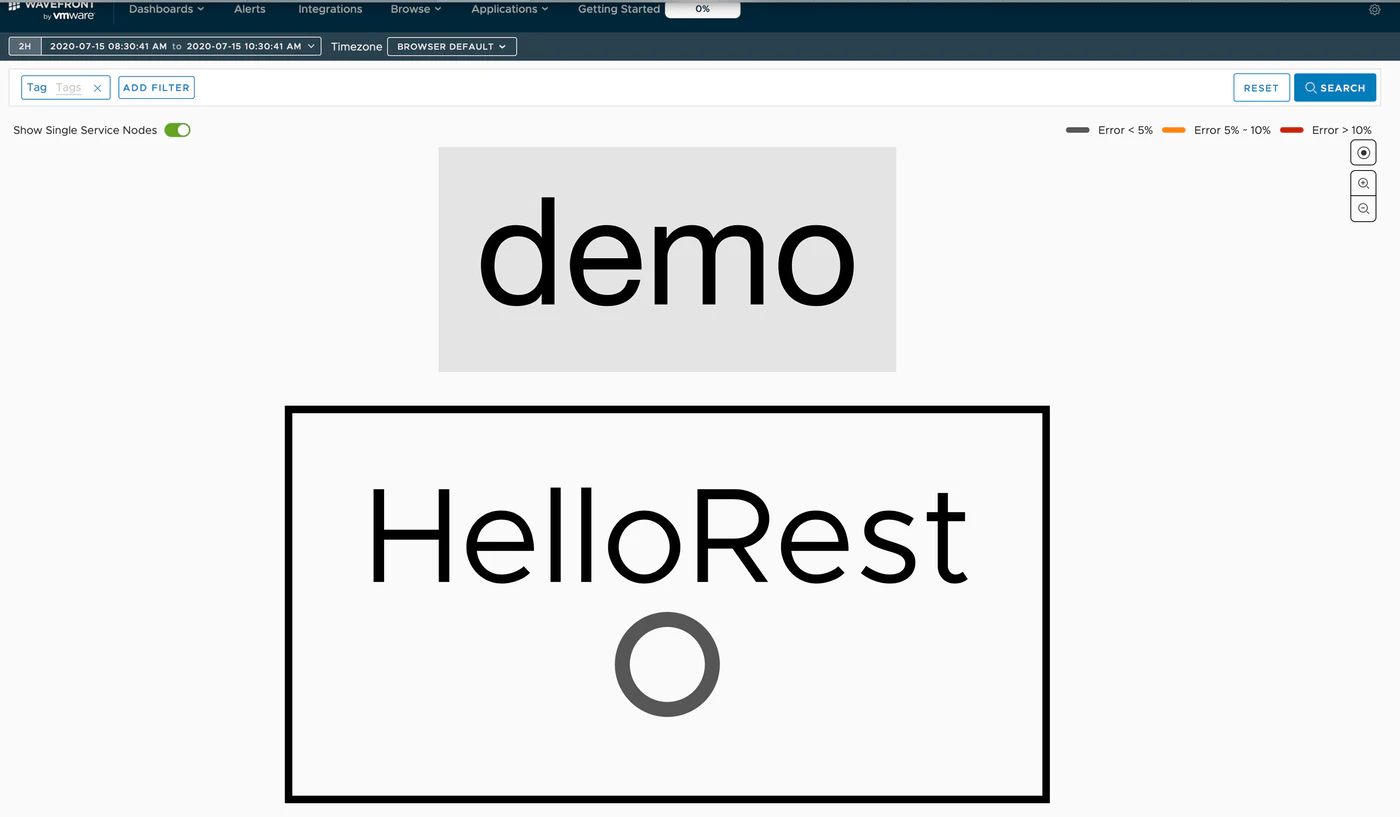 HelloRestをクリックして、View Traces For Serviceをクリックします。
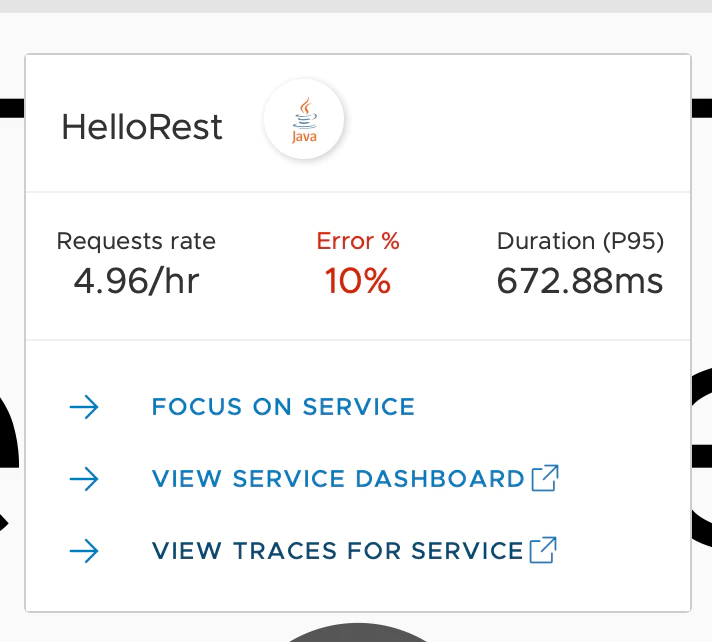 すると、Trace一覧が表示されます。
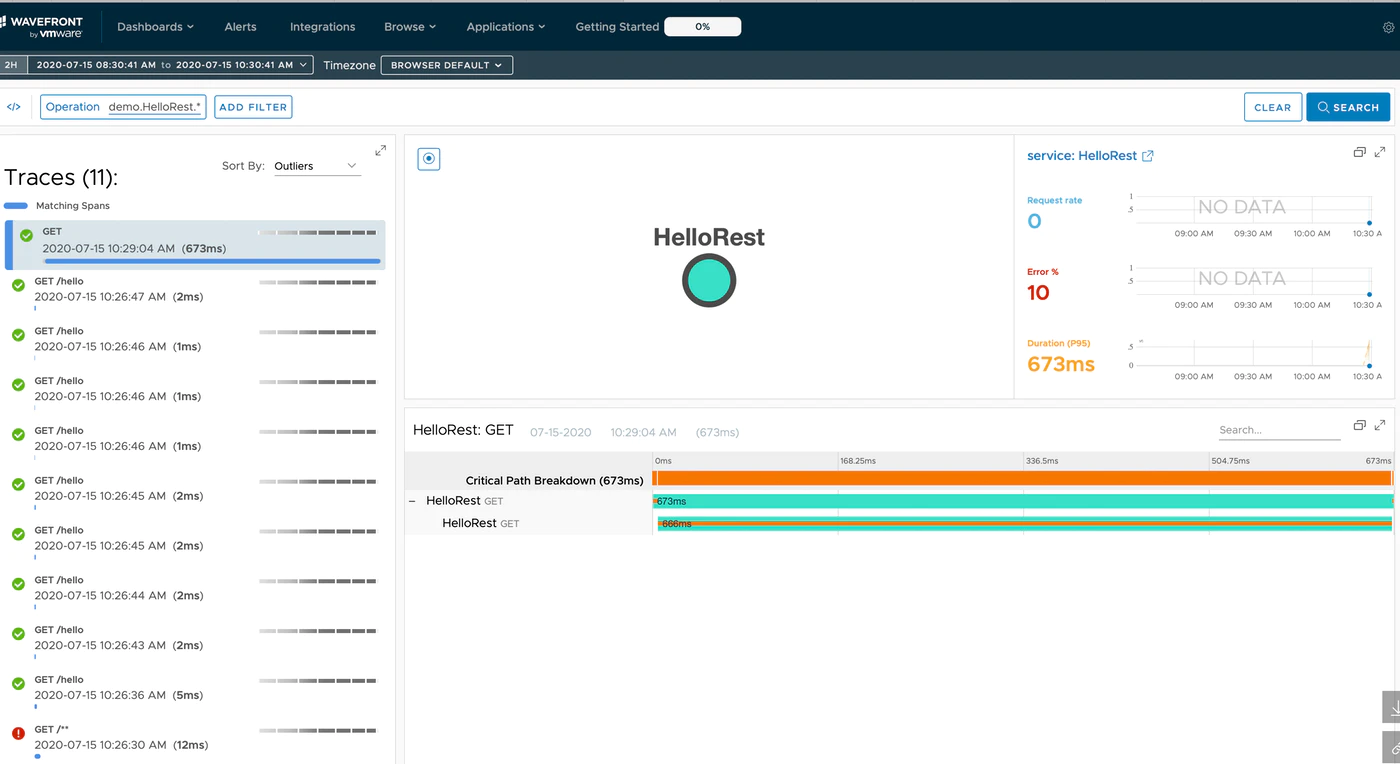
なんと、これで分散トレーシングを体験することができました。
ちょっと待って、何が起きている?
説明をほとんどせず、ここまできてしまいましたので、補足します。
まず、今回作成したアプリケーションは、結果にあるとおり、Hello World!と返すシンプルなREST APIアプリケーションです。
今回使用したSpring Bootは、このREST APIアプリケーションを簡易につくることのできるフレームワークです。 コード上は、いかの部分が、URLとREST APIを作成するための箇所です。
@RestController
class HelloRestController {

	private static final Logger LOGGER = LoggerFactory.getLogger(HelloRestController.class);

	@GetMapping("/hello")
	public ResponseEntity<String> hello (@RequestHeader Map<String, String> header){
		printAllHeaders(header);return
		ResponseEntity.ok("Hello World!");
	}

	private void printAllHeaders(Map<String, String> headers) {
		headers.forEach((key, value) -> {
			LOGGER.info(String.format("Header '%s' = %s", key, value));
		});
	}
}
さて、コードそのものの説明は割愛しますが。。。気づいてほしい点として、Wavefrontとの連携箇所を表したコーディング箇所はほとんどないです。では、なぜWavefrontと連携できていたかというと、その前の手順にあったstart.spring.ioでの依存関係追加部分です。以下で言うところの② ~ ④の箇所です。
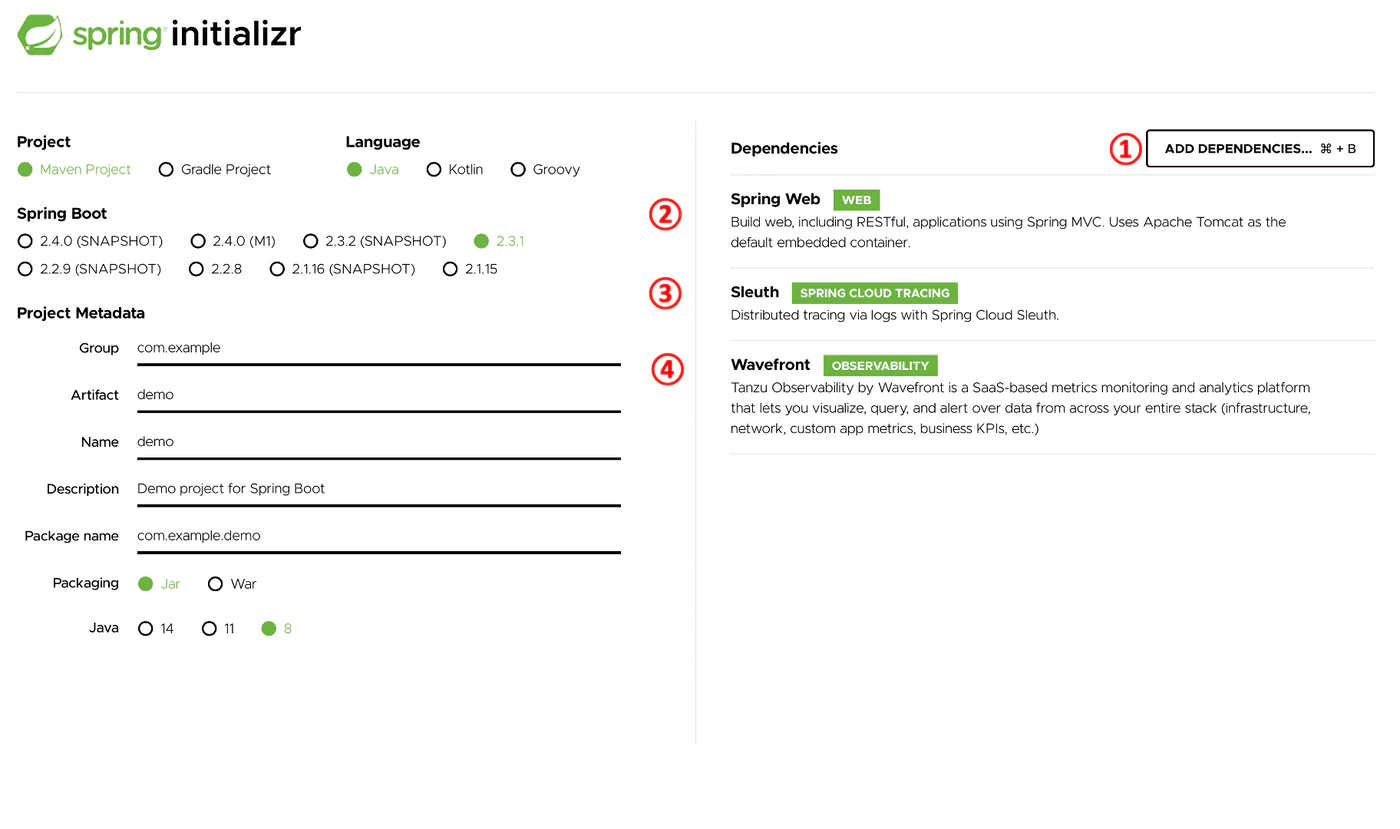
もうすこし、この依存関係が何をしているかについてですが、
- Spring Web : 今回作ったようなRESTサービスの雛形を提供
- Sleuth : 分散トレーシングの中心部分。それぞれのリクエストに対して、自動的にTrace、Span情報を付与してくれる。
- Wavefront : Wavefrontへの接続を行ってくれる。
Trace、Spanという単語が突然でてきましたが、概要編に記載したように
- Trace : 複数Spanがまとまったひとつの処理
- Span : 処理の単位。一般的には一つのRESTリクエストもしくはAMQPリクエスト
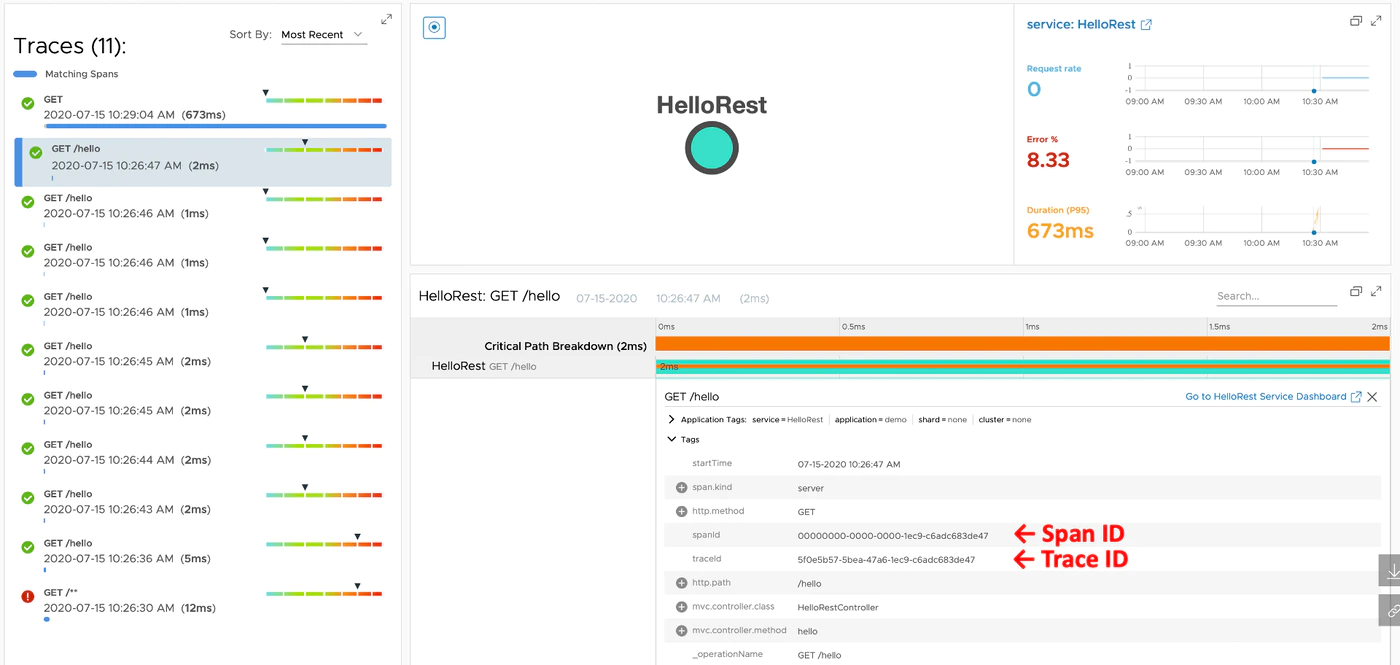
先ほど追加したSleuthが分散トレーシングの中心的な役割を果たしており、コードとは透過的に各HTTPリクエストに対して、Trace IDとSpan IDを付与しています。
アプリ側のログをみると、多分以下のようなログが表示されています。
2020-07-15 10:26:47.356 INFO [hellorest,5f0e5b575bea47a61ec9c6adc683de47,1ec9c6adc683de47,true] ...
この場合、5f0e5b575bea47a61ec9c6adc683de47がSleuthが追加したTrace IDであり、1ec9c6adc683de47がSpan IDです。
Wavefrontでも、このTrace IDとSpan IDがログから見えます。
さて、Wavefront側ですが、必要な設定は以下だけでした。
spring.application.name=hellorest
management.endpoints.web.exposure.include=health,info,wavefront
server.port=8081
wavefront.application.name=demo
wavefront.application.service=HelloRest
この中で、wavefront.application.nameとwavefront.application.serviceがWavefront上でどのように表示されるかを制御しています。
この状態でアプリケーションを起動すると、自動でFreemium(無料)アカウントを作成され、利用可能となります。 Freemiumアカウントは本アカウントと比べると、様々な制約がありますが、試すには手っ取り早いと思います。
なお、http://localhost:8081/actuator/wavefront
のURLは自動でこのFreemiumアカウントにフォワードされます。
このURLはmanagement.endpoints.web.exposure.include=wavefrontと設定した場合に有効になります。
ここまで簡単に早くできるのは、Spring Bootのメリットです。のちに取り上げますが、他の言語だと結構大変です。 Spring Boot、WavefrontともにVMwareの配下にあり、連携が今後も強化される予定です。
まとめ
今回の内容についてまとめます。
- Spring Bootを使うとWavefront固有のコーディングなく連携ができる
- 分散トレーシングのTrace IDとSpan IDはSleuthがこれまたコーディングの必要なくやってくれる
- Wavefrontの接続は、Freemiumアカウントが勝手に作成され、すぐに利用できる
- Spring Boot + Wavefrontはなかなかに良い
次回 第三回は「REDメトリクスって何?」